You may need to remove your chain to either replace it or when you’re cleaning your drivetrain. We show you how to easily do this whether you have a general style chain with pins or if you’re using a quick link / PowerLink to connect your chain. We also go through a couple tech tips to make it a smoother job.
Removing a Shimano bike chain
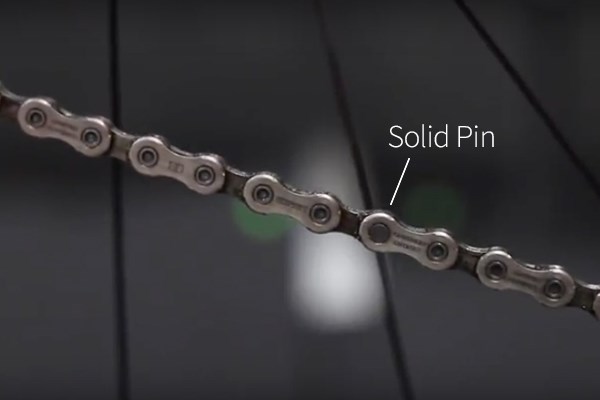
Shimano uses a special pin to connect their chains. Many high-end Shimano chains have hollow pins, and one specific solid pin that allows you to break and reconnect the chain. You will need a chain tool for this.
1Find the solid pin in the chain
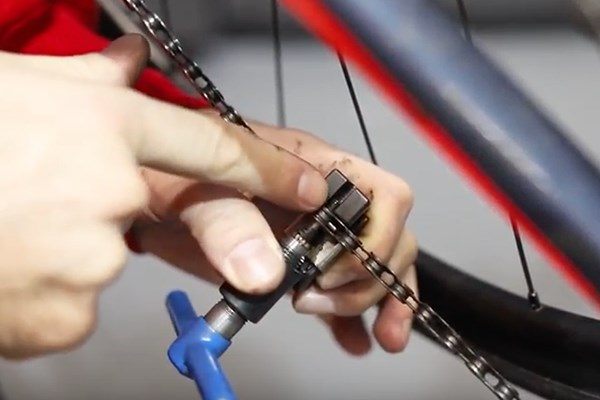
Locate the solid pin in the chain. It will be darker in colour and not have a ridge as the other pins do. The chain tool has two ridges, and the chain fits onto these with the pin in between. It should line-up with the pin of the chain tool. It’s important that the two pins line up. If you’re chain tool pin is bent, replace it.
2Breaking the chain
With one hand, hold the chain in place in the tool so that the chain doesn’t move. With your other hand, slowly turn the pin remover, making sure it is always centred on the chain pin. Keep going until the pin is pushed all the way out (be sure you have a replacement pin for the chain if you’ll be reusing the chain).
Popular chain tools
How to correctly route your chain
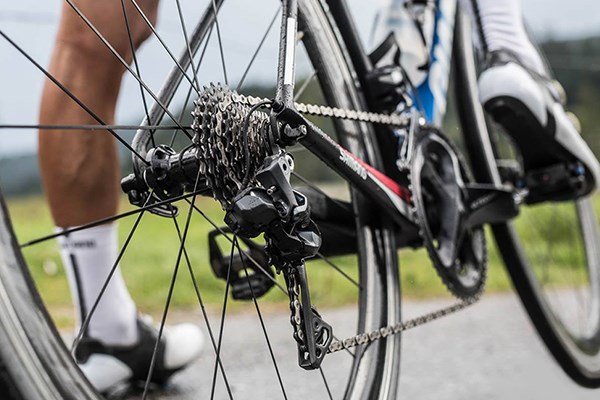
It is easy to route your chain around your bike’s drivetrain with some initial guidance.
1Front Derailleur
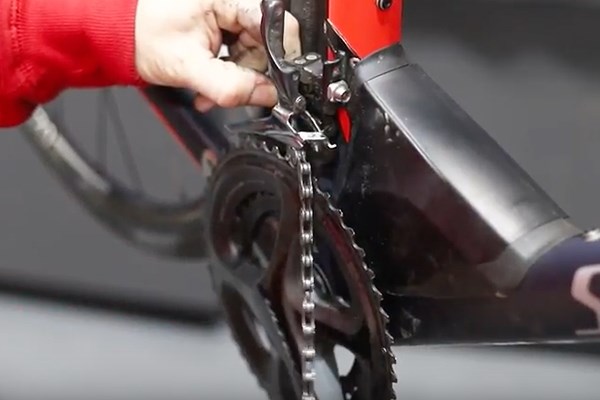
If you have a front derailleur, you want to thread the chain through here first. Place it on the small chainring after and pull towards the back of the bike.
2Enough Chain
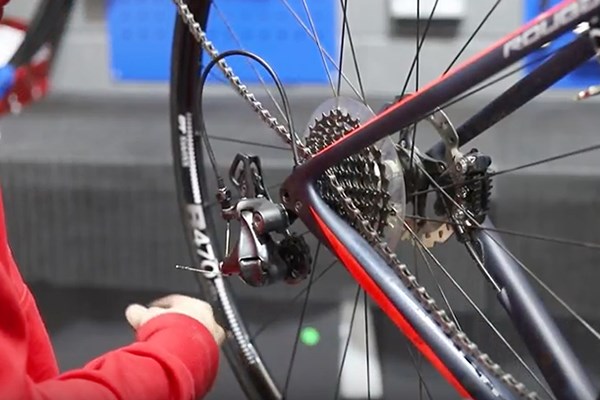
Make sure you have enough chain to fit through the rear derailleur, but also make sure the chain doesn’t slip out of the front derailleur. Pull the chain over the top of the cassette.
3Rear Derailleur
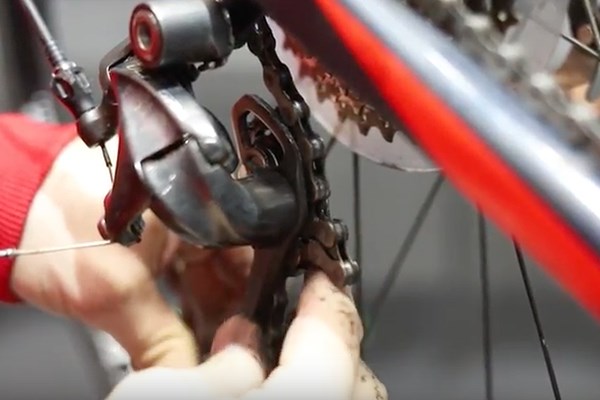
Next wrap it around the cassette and over the top of the top derailleur jockey wheel. Thread the chain between the jockey wheel and the tab on the derailleur cage. Make sure the chain is routed inside the tab. Wrap the chain over the next jockey wheel so that it is in an ‘S’ shape. Wrap the chain around the bottom of jockey wheel, again making sure it is inside the tab.
How to simplify refitting your chain
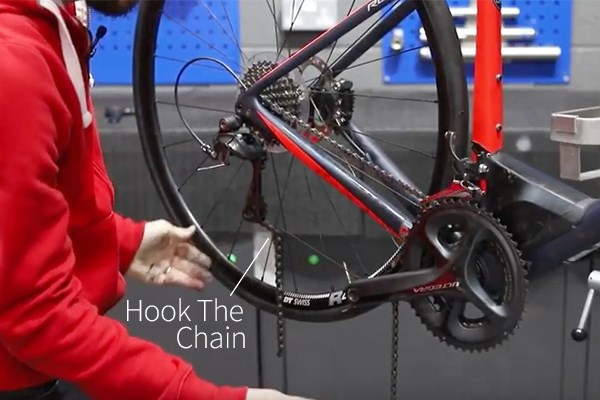
A neat trick to make reconnecting your chain stress-free and much easier.
1Hook Tool
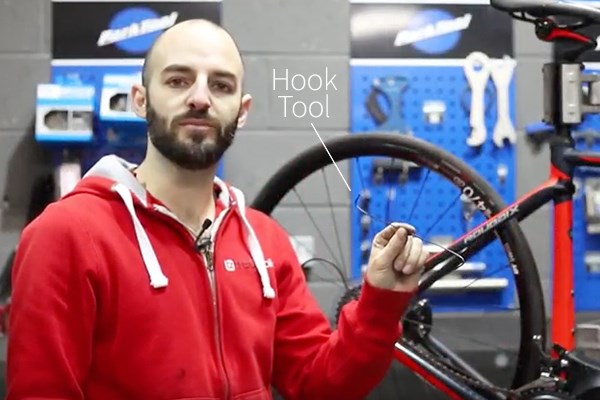
A spare spoke works best, though any stiff wire will work, such as a wire clothes hanger. Various lengths will work, but between 20 - 30cm is ideal. Bend both ends into acute angles, so they have a hook. Make sure they are not too closed to be able to fit a chain and closed enough to hold the chain. You can also find exact tool here.
2Hook Chain together
Hook one side of your new tool into the chain that’s hanging from your chainset about 5 links up from the end. Next, hold the rear derailleur forward so that the chain is closer to the front. Hook the other end of the chain into the other side of the chain, again about 5 links from the end.
How to refit a Shimano chain
You will need a new Shimano Chain Pin and a chain tool to refit the chain. A set of pliers will also be needed.
1Insert pin into chain
Hold both ends of the chain together, putting the male part inside the female part of the chain. Insert the new Shimano Chain Pin into the chain where the two sides of the chain meet.

2Pressing new pin
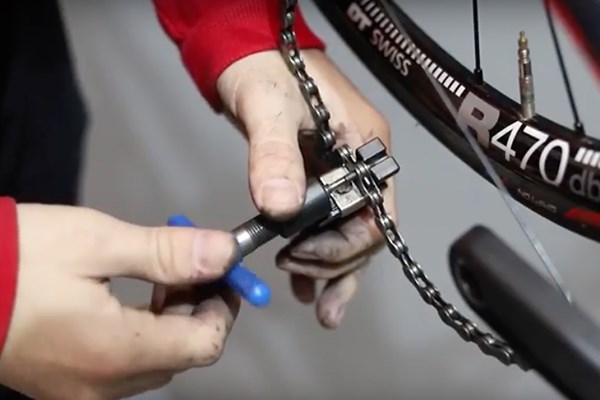
Place the chain into the chain tool onto the two ridges with the new pin facing the pin of the chain tool. Make sure the pin on the chain tool is directly centre with the pin on the chain. With one hand, hold the chain in place in the tool so that the chain doesn’t move. With your other hand, slowly turn the pin remover, making sure it is always centred on the chain pin. Keep rotating until the new pin is flush on either side of the chain and that the tapered side of the new pin is all the way outside the chain.
3Removing pin excess
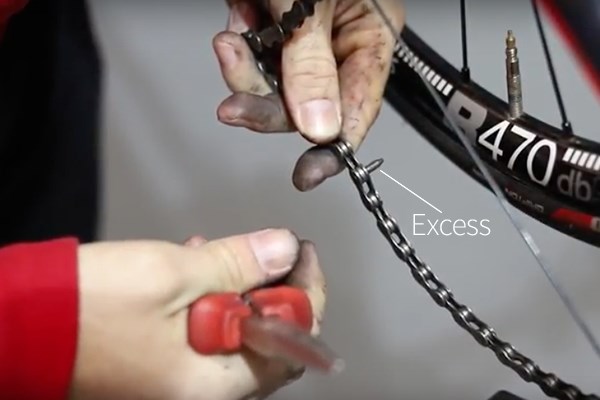
Next, take the chain out of the chain tool. Hold the chain firmly in one hand and with the pliers, grab the extra part of the chain pin. Grip the pin tight and twist until it snaps off. It should be a clean quick break. Rotate the cranks a few times to make sure the drivetrain is running smoothly and you should be good to go.
How to remove and fit a Quick link / Powerlink chain
Quick links (or SRAM’s Powerlinks) make removing and replacing the chain super easy. You will need quick link pliers and a new quick link for this.
1Removing the chain
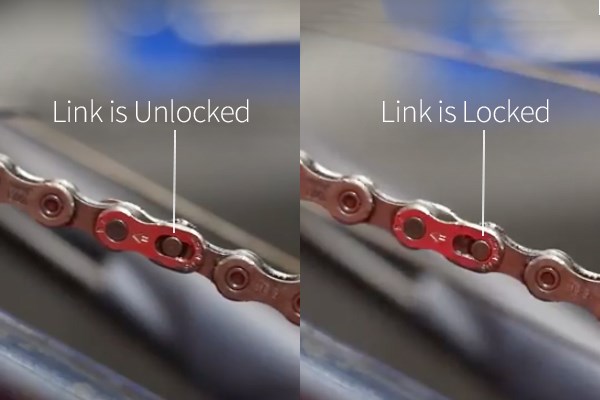
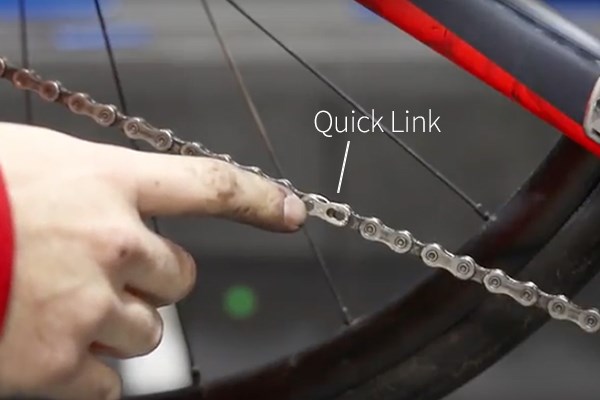
Find the quick link on your chain. It is distinguished by its gaps near the chain pins. Take the quick link pliers and fit each end on either side of the quick link. Squeeze the pliers together and the chain should separate.
2Installing the quick link
Most quick links are single use, so it’s important to have a new one handy. Grab one side of the chain and fit one part of the quick link into the end. Grab the other side and fit the second part of the quick link on the opposite side of the chain. Squeeze them together so that the pins are lined up on the quick link.
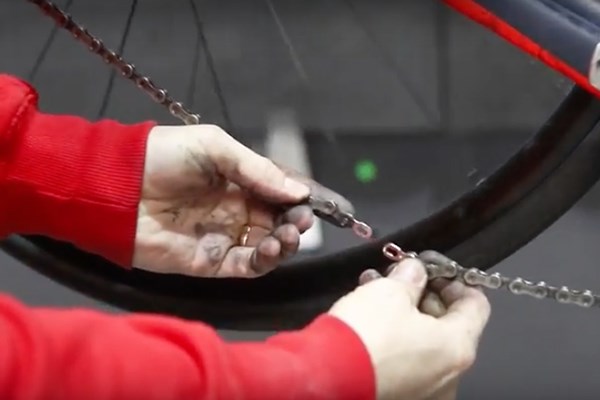
3Locking the quick link
Rotate the chainset around so that the quick link is located at the top of the chain. To secure the chain, hold onto the rear wheel so it does not rotate, and turn the chainset forwards. This will pull the chain apart and lock the quick link together. Give the chainset a few rotations to make sure it’s secure and you’re good to go.
